Traffic
The traffic simulation uses a traffic system. The traffic system contains the roads, lanes, crossings, traffic lights and traffic rules that apply.
To create a traffic system you should follow the next steps:
Create a set of curves that are the template of the traffic system.
Create a traffic system from the curves.
Configure the traffic system.
Adding a traffic system
First you start modelling the template of your traffic system with Curves. These curves will be used to outline the roads, lanes and crossings in the traffic system.
Note
Supported Curves
The curves that are supported are Bezier and Poly curves. NURBS and Paths are not supported. The Cyclic setting of a curve will be ignored.
Once you have modelled the curves for the traffic system you can then add these curves to a traffic system by selecting the curves and then selecting Traffic > Add Traffic System from the Add menu. A new traffic system is created and the curves are added. Where the curves end a connector is generated. Curves that end at the same location share the same connector. This connector represents a crossing, a location where roads can connect.
Make sure you name your curve objects wisely. The name of the curve object is used to model traffic rules/traffic lights and lanes. Without clear names it will be difficult to configure the junction and traffic lights properly.
Adding and removing curves
You can also add a curve to an existing traffic system by selecting the curve and then setting the traffic system as active selection. Then select Traffic > Add Traffic System from the Add menu.
A curve can only be part of one traffic system. When adding a curve to another system, it first needs to be removed from the original traffic system.
If you want to remove a curve from its traffic system you can select the curve object and then select Object > Traffic > Remove From Traffic System. See Remove From Traffic System for more details.
Panels
A traffic system can be configured in the Viewport > Sidepanel > Crowd > Traffic Panel.
Based on the type of object selected a different panel will be shown.
Traffic System Settings
When a traffic system is selected the next panel is shown.
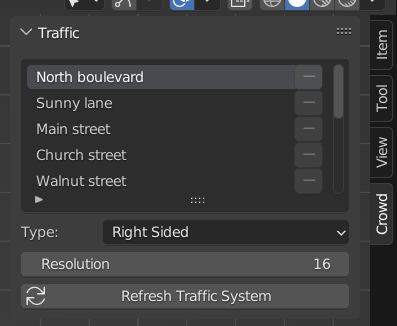
- Curves
Shows a list of all curves that are part of the system. A curve can only be part of one traffic system. Next to each curve there is a button to remove the curve from the traffic system.
- Type
The type of traffic system to simulate. Choices are:
Left Sided
Right Sided
The selected type will influence the direction of the lanes and the traffic rules that are used.
- Resolution
The number of steps that are generated for displaying and evaluating the traffic system. A higher setting will generate more sample points making the simulation more natural in cost of memory and evaluation time. Default value is 16.
- Refresh Traffic System
When changing curves, the traffic system can get out of sync with the curves. By pressing Refresh Traffic System the mesh is regenerated. See Refresh Traffic System for more information about refreshing traffic systems
Curve Settings
When a curve is selected that is part of a traffic system the next panel will be shown.
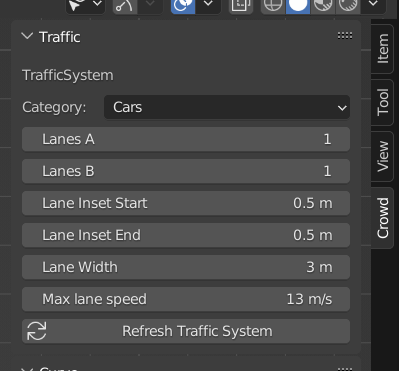
- Category
Set the type of road that this curve represents. Options are:
Cars
Pedestrians
Trams or Busses
This limits the type of agent that is allowed to take this road. Agents that aren’t allowed to take the road, will choose a different route. The agent will stop just before the connector where it can’t continue and can block the lane for other agents. So keep in mind when modelling your traffic system that agents always need to be able to continue.
- Lanes A
Number of lanes that will be generated on one side of the road. This setting can be set to 0 for a single sided road.
- Lanes B
Number of lanes that will be generated on the other side of the road. This setting can be set to 0 for a single sided road.
- Lane Inset Start
The amount of distance between the first lane and the center of the start of the curve. This number can be negative for single sided roads to better control the attachment point.
- Lane Inset End
The amount of distance between the first lane and the center of the end of the curve. This number can be negative for single sided roads to better control the attachment point.
- Lane Width
The width of each lane.
- Lane Margin
The distance between lanes from the same side. This option is only available when Lanes A or Lanes B is 2 or more.
- Max lane speed
Set the maximum speed allowed for the lane(s) of this curve.
- Refresh Traffic System
When manually changing curves the traffic system can get out of sync with the curves. By pressing Refresh Traffic System the mesh is regenerated. See Refresh Traffic System for more information about refreshing traffic systems
Connector Settings
When a connector of a traffic system is selected the next panel is shown in the Viewport > Sidepanel > Crowd > Traffic panel
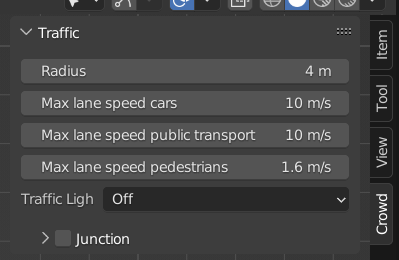
- Radius
The radius of the crossing.
- Max lane speed cars
Set the maximum speed for cars for this connector.
- Max lane speed public transport
Set the maximum speed for public transport for this connector.
- Max lane speed pedestrians
Set the maximum speed for pedestrians for this connector.
- Traffic Lights
The way the crossing is controlled. Possible choices:
Off: This crossing is not controlled by any traffic lights. Traffic rules determine who has more precedence.
Automatic: This crossing is controlled by automatic traffic lights. When this option is selected the next options can be set
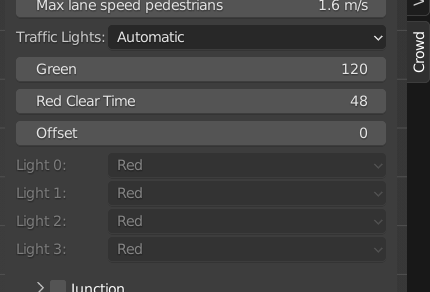
- Green
The number of frames green light is shown per road.
- Red Clear Time
The number of frames between a light turning red and the next light turning green. This parameter can be used to configure the time needed to clear a crossing.
- Offset
The number of frames used as an animation offset for the traffic lights. This parameter can be used to give a more natural distribution or to sync multiple crossings.
- Lights
This shows a list of the created traffic lights and its current state.
Manual: The traffic lights of this crossing can be configured manually. This gives the most flexibility and the ability to create complex configurations.
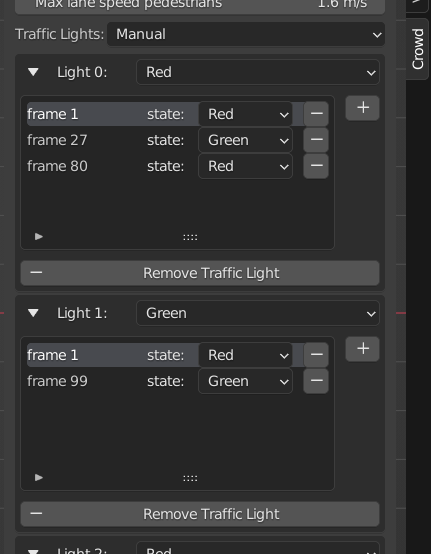
- Add Traffic Light
Adds a new traffic light. Traffic lights can be shared between multiple lanes and roads.
Per traffic light the next options can be set:
- Traffic Light State
The state of the light. This field is updated on frame change to the actual light state of the frame. You can change the state and press the
+button to record the state for the current frame (Similar to key-framing).- Keyframes
A list of recorded key-frames. In this list it is still possible to change the state of the traffic light at the given frame. This list is always ordered on frame number.
- Remove Traffic Light
Remove the traffic light from the crossing.
- Loop Lights
Enable a loop animation for the configured lights.
- Loop Duration
The number of frames when the traffic light animation will be repeated.
- Lanes
Set the light number of every incoming lane to the crossing. It is possible to assign single traffic light to multiple lanes.
The name of the lane is build up by the name of the curve followed by a number indicating the spline index of the curve followed by a number indicating the lane number. The lane number is counted from the inside to the outside.
0 will link a lane to the first light of the crossing (Light 0), 1 will link to the second light of the crossing (Light 1) When the number is set to -1 no traffic light is assigned to that lane.
A warning will be displayed when the assigned light number doesn’t exist. For the traffic light to work all warnings needs to be handled. See Validate to keep an eye out on these kind of warnings.
The configuration of traffic lights are visualized in the 3d viewport.
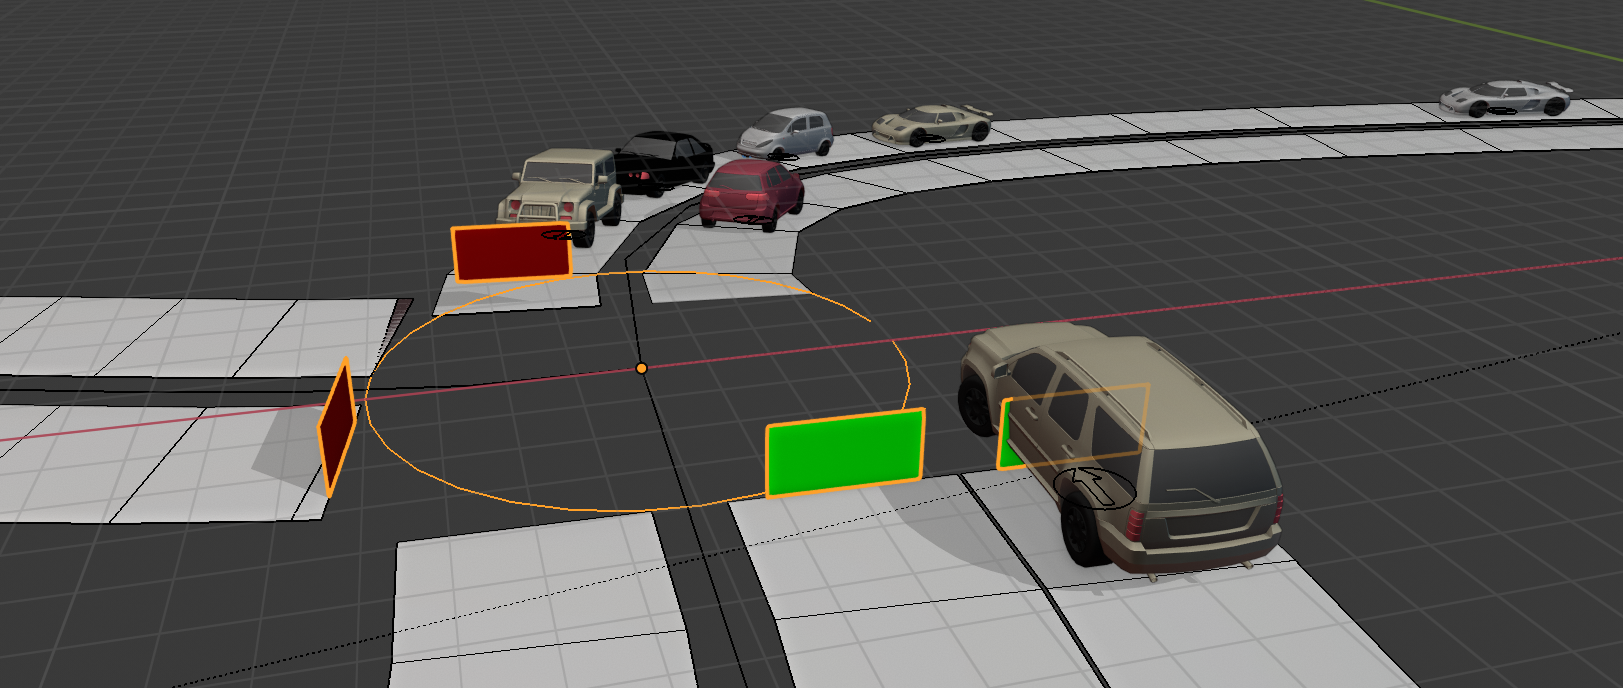
The red planes are rendered by lanes that are waiting for a red light. The green planes are rendered by lanes that are having a green light.
When changing the current frame, the lights are updated to show the current configuration.
- Junction
Lanes coming into the crossing can be connected with outgoing lanes. This models the way agents can pass the crossing. This can be done automatically (Off) or manual (On).
Off: the incoming and outgoing lane connections are controlled automatically. The next rules will be used to generate the connections:
All lanes of the incoming road will be connected to all outgoing lanes, except the outgoing lane of the same road to disallow U-turns.
On: The connections between the incoming and outgoing lanes will be configured manually. This allows more flexibility and complexer crossings.
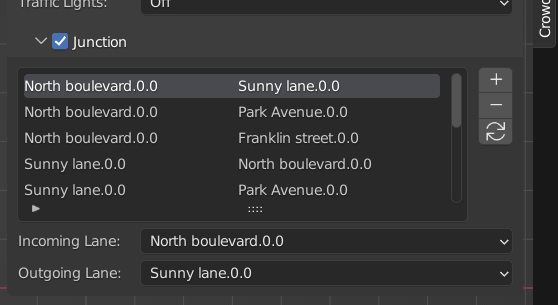
When first set a default configuration will be added. This configuration will connect all incoming lanes to any outgoing lane except if they are from the same road. It is possible to reset the configuration to this setup by pressing the Reset Junction button. This button can also be found in the Object > Traffic > Reset Junction Menu.
By pressing + a new connection can be configured. By pressing - a connection can be removed. Per connection the incoming and outgoing lane can be selected. When the same connection is added twice a warning will be shown.
The name of the lane is build up by the name of the curve followed by a number indicating the spline index of the curve followed by a number indicating the lane number. The lane number is counted from the inside to the outside.
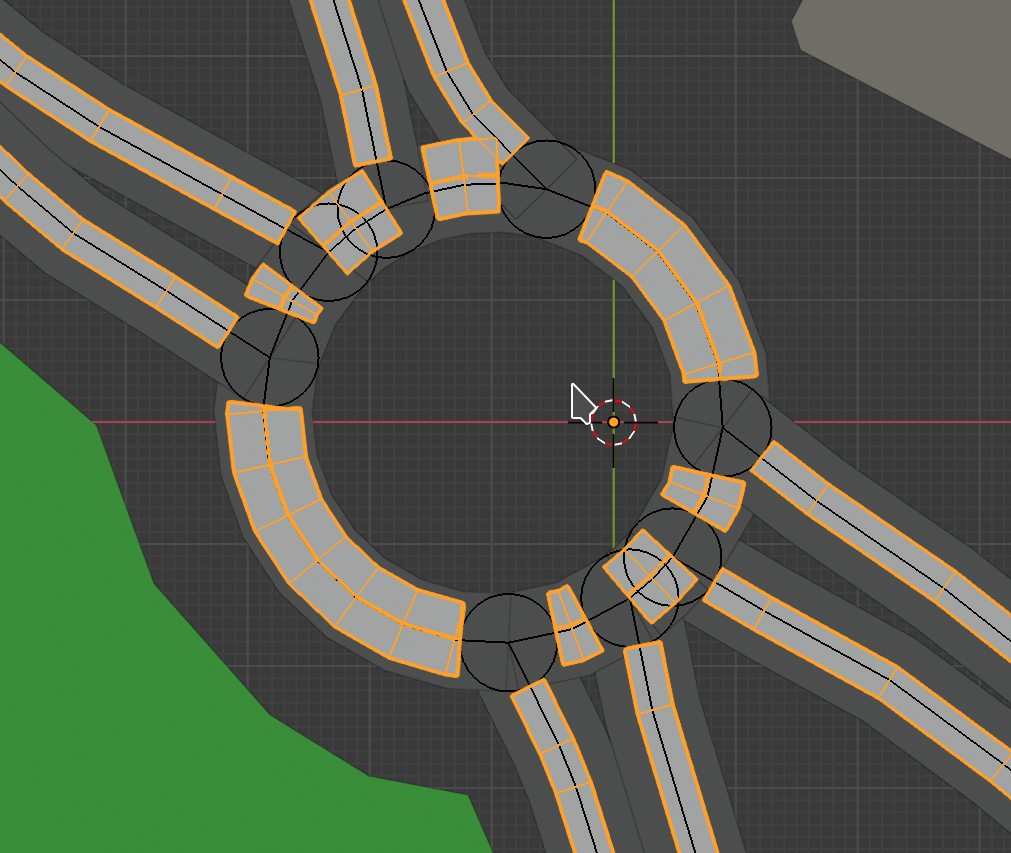
With the Traffic Lights and Junction a wide variety of crossings can be created. For example a round-a-bout
Agent settings
When an agent in a traffic system is selected the user can see the traffic settings for the agent. These settings can be adjusted.
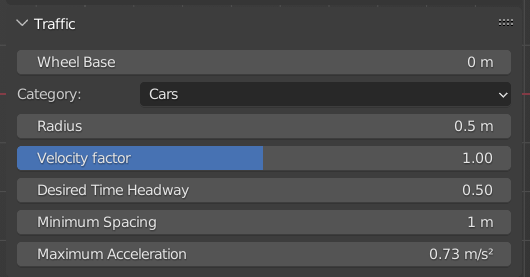
All these settings have been described earlier.