Populate Agents
Once you have set up your Material and Character variables and have agents in your scene, you can “Populate” your agents. Populate will distribute select meshes and materials and properties of the agents.
You can populate agents in two ways:
Automatic selection using the Populate in the Node Editor.
Manual selection via .
Automatic selection
Once you have setup mesh variations you can automatically select a random variation to each agent. This is done using the Node Editor.
Go to the Node Editor.
Add a new CrowdSim node tree or use an existing one.
Add a Populate node to the node tree. Select the model you want to apply to the agents.
Connect a Mesh Variable, Material Variable or Agent Variable node to the Variances socket of the populate node.
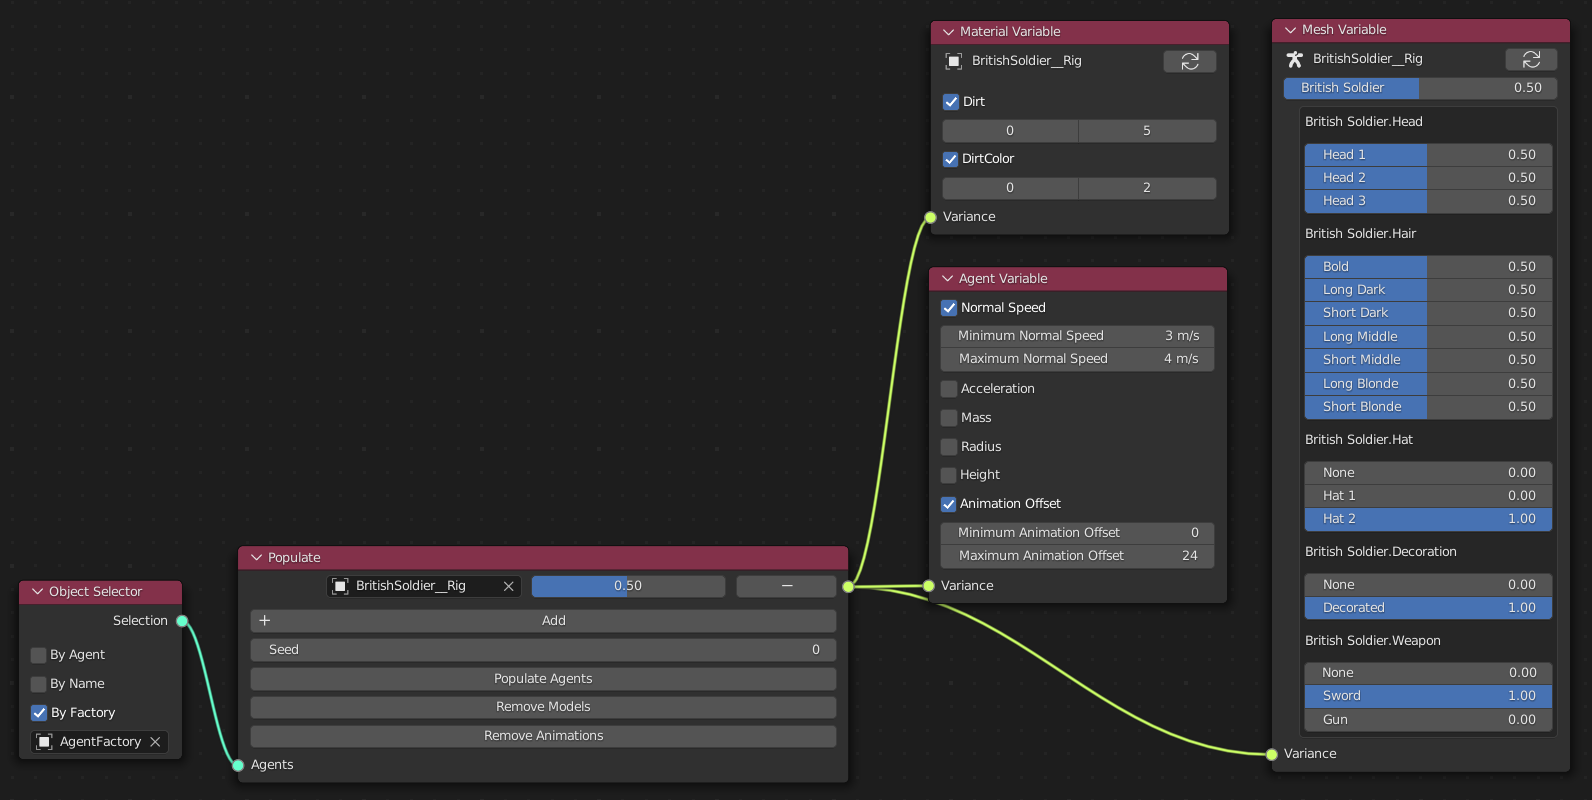
When connected the nodes displays the Material Variables and Mesh variables of the model in the node.
In the Mesh Variable node you can select the weights for the characters and the weighted mesh groups the model has.
In the Material Variable you can enable material variables to be populated and the range.
After pressing Populate of the Populate node all agents in the scene will get random mesh/material variables.
You can use the Object Selector node and connect it to the Agents socket of the populate node to limit the affected agents.
Note
After Automatic selection you can still change the model, character, meshes and materials per agent. See Manual selection for more information.
Agents that are locked will not get new values for characters and meshes. They will keep the values they already have.
Manual selection
When using manual selection you can only modify a single agent at a time.
panel.
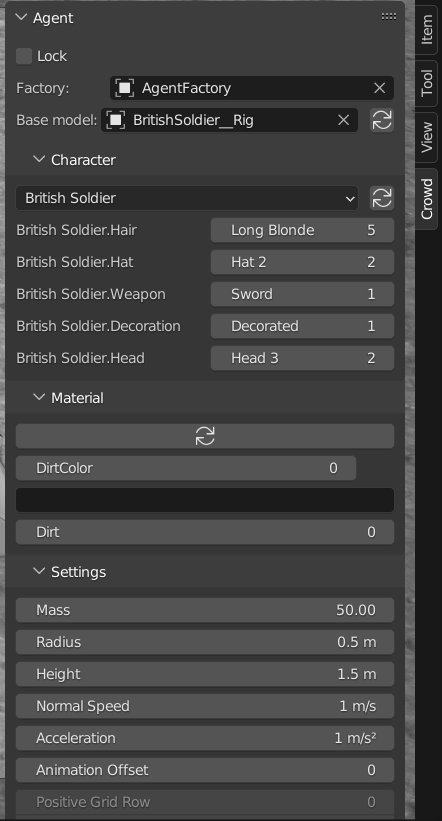
Factory: Factory the selected agents belongs to. [Advance option]
Base Model: The model of the selected agent.
Character: Active character of the agent. Characters can be defined when configuring the armature mesh variations.
Mesh Variations: Shows the mesh variations options that are setup for the chosen character. The mesh variations can be manually edited here.
Material*: Shows the material variations options that are setup for the chosen character. The material variations can be manually edited here.
Settings: Setting of the agent to influence the simulation.
Mass: Mass to take into account when colliding with other objects.
Radius: Radius of the agent to take into account when avoiding other agents and obstacles.
Height: Approx height of the agent to take into account when colliding with other objects.
Normal Speed: The default speed when not evading other objects.
Acceleration: Acceleration (and decelaration) to use.
Animation Offset: Used to generate variation when animations start to play. Generates a more random look as not all agents displays the same frame of an animation action.
Positive/negative Grid Column/Row: Only valid when using a grid factory. It contains the index from the beginning/end of a column/row the agent is in.
Traffic: Settings of the agents that influences the traffic simulation.
Radius: Radius of the agent to take into account when avoiding other agents and obstacles.
Velocity Factor: Roads and lanes have their maximum speed. This factor is a percentage that the agent will use when using that road/lane. 1.0 will use the speed that is configured for the lane/road. Less than 1.0 would take a slower speed and higher than 1.0 would use a faster speed.
Desired Time Headway: When riding the amount of time to its car in front.
Minimum Spacing: When standing still the minimum allowed space to the car in front.
Maximum Acceleration: Maximum acceleration to use during a traffic simulation.
Note
Tips
Keep the range of material variables small. For every combination of material variations a copy of the material is created. When you have a lot of options or a large range it will influence the render performance.
In Blender a material is part of the mesh data so even complete meshes are copied.
When linking a model from another blend file, make sure you link in the Images you want to variate. Otherwise these cannot be found. Most of the time it is enough to load the Character Configuration (Node tree with the character node) and the images.
Populate
This section describes the nodes that can be used for populating your agents. These nodes can be found in the Populate category in the node editor.
Populate

With this node you can select the models for your crowd simulation. You can create several variances of this model by attaching Material and Mesh Variables to this node. You can also configure the agent(s) properties with the Agent Variable node.
Agent Variable
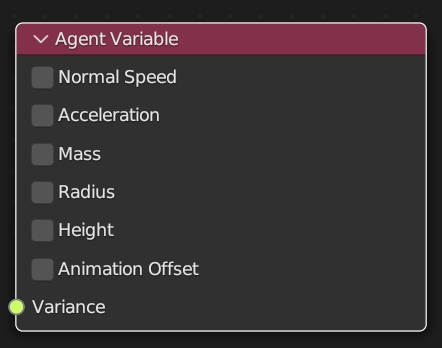
With this option you can variate speed and acceleration and other properties of your character.
Options to variate:
Normal Speed: Speed considered the normal speed of the agent
Mass: The mass of the agent. Collisions uses this to calculate the impact of the collision.
Radius: The radius of the agent.
Height: The height of the agent.
Animation Offset: The animation offset of the agent.
Material Variable
Configure which material variables and their values should be used. The options displayed are from the character connected to the Populate node.
See the start of this section for an example.
Mesh Variable
Configure your armature and meshes. The options displayed are from the character connected to the Populate node.
See the start of this section for an example.
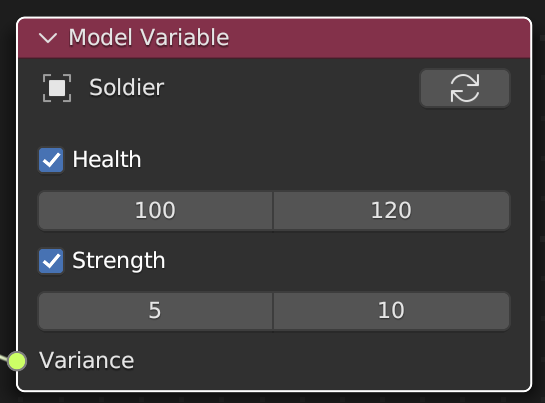
Model Variable
A model variable node can be added to the Populate to randomize Model variables during populate.
Traffic Variable
With this node you can vary the speed, acceleration and other properties of your character.
Per setting you can set a minimum and a maximum allowed value. During Populate Agents a value between the minimum and maximum value will be chosen.
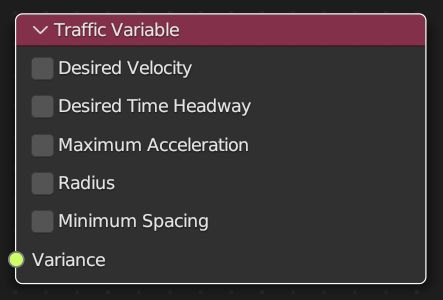
Radius: Radius of the agent to take into account when avoiding other agents and obstacles.
Velocity Factor: Roads and lanes have their maximum speed. This factor is a percentage that the agent will use when using that road/lane. 1.0 will use the speed that is configured for the lane/road. Less than 1.0 would take a slower speed and higher than 1.0 would use a faster speed.
Desired Time Headway: When riding the amount of time to its car in front.
Minimum Spacing: When standing still the minimum allowed space to the car in front.
Maximum Acceleration: Maximum acceleration to use during a traffic simulation.
Lane Switch Avg Vely: Threshold average velocity (in meters/second) that an agent will use when switching lanes.
Note
Radius is used for collision detection. It is advisable to keep the radius small (1.5) and increase the Minimum Spacing for a better simulation result.
With a too large Radius cars will stop for traffic on other lanes. With a too low Minimum Spacing cars will intersect when standing still before a crossing.